Happy Birthday Cactus

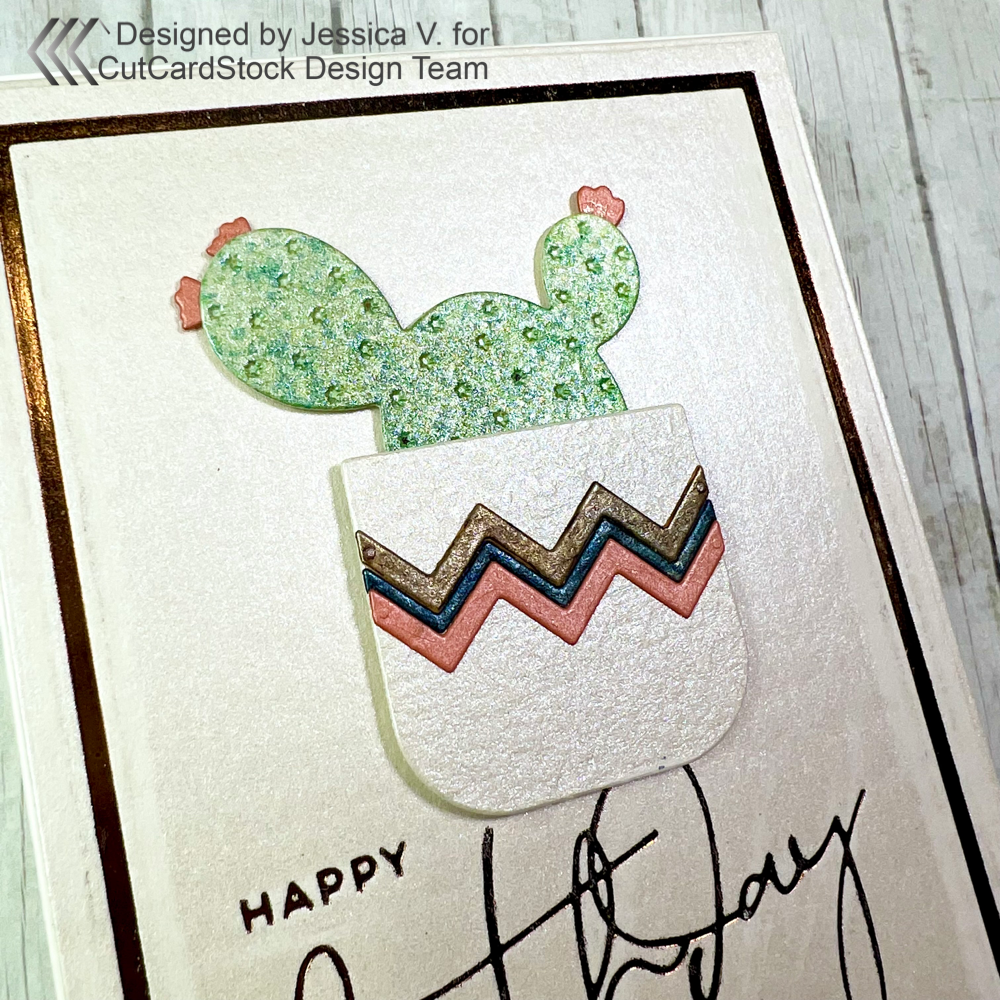
I have a really sharp card to share with you today, I hope it prickles your fancy! šŸ˜€ …. ahh I love puns. I used some textured pearl cardstock to make this cactus card today.

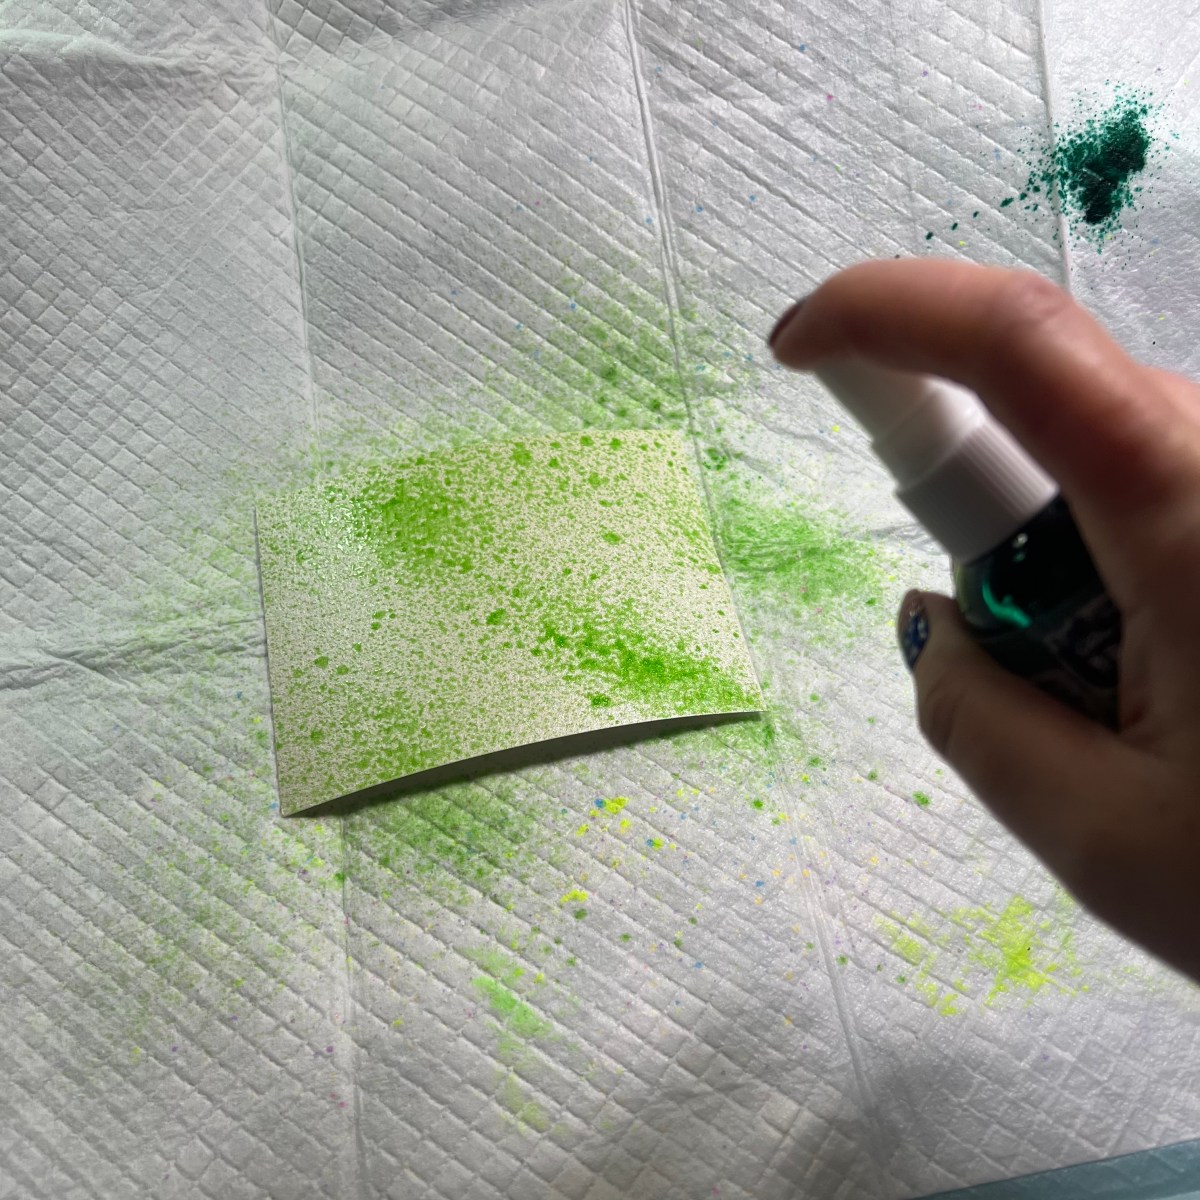
I started with an A2 sized panel and a couple different green ink sprays. I wanted to add some interest and color to this piece which will be what is die cut to make the cactus.

I have a stack of dog pee pads that I used when I’m spraying inks to help keep the surrounding area clean. I just spread it out over my work surface and I don’t have to worry about the ink getting all over my desk (and all the mess that is on my desk!). When I’m done, I just fold it up and it reuse it several times.

Once the spray inks were dry, I added some green and brown ink to deepen the color, using blending brushes.

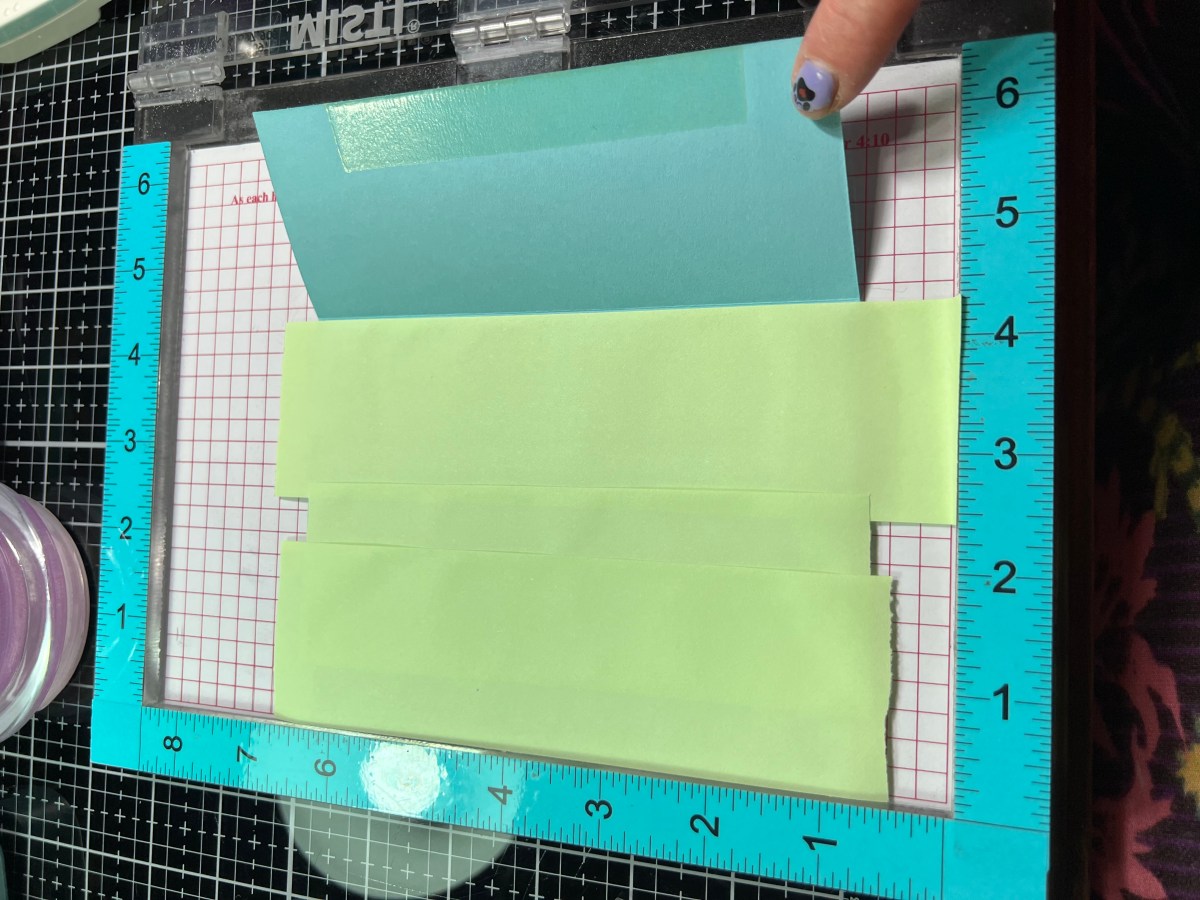
Once that piece was dry, I die cut the cactus from it. I also used the Stardream Metallic Flame to die cut flowers to go on the cactus as well as some stripes to decorate the pot that the cactus will go in. I also used the pearl ivory cardstock to cut a few strips that I will color to go on the pot.

I used a couple different alcohol markers to color the ivory stripes. Alcohol markers are great for this and dry really quickly!

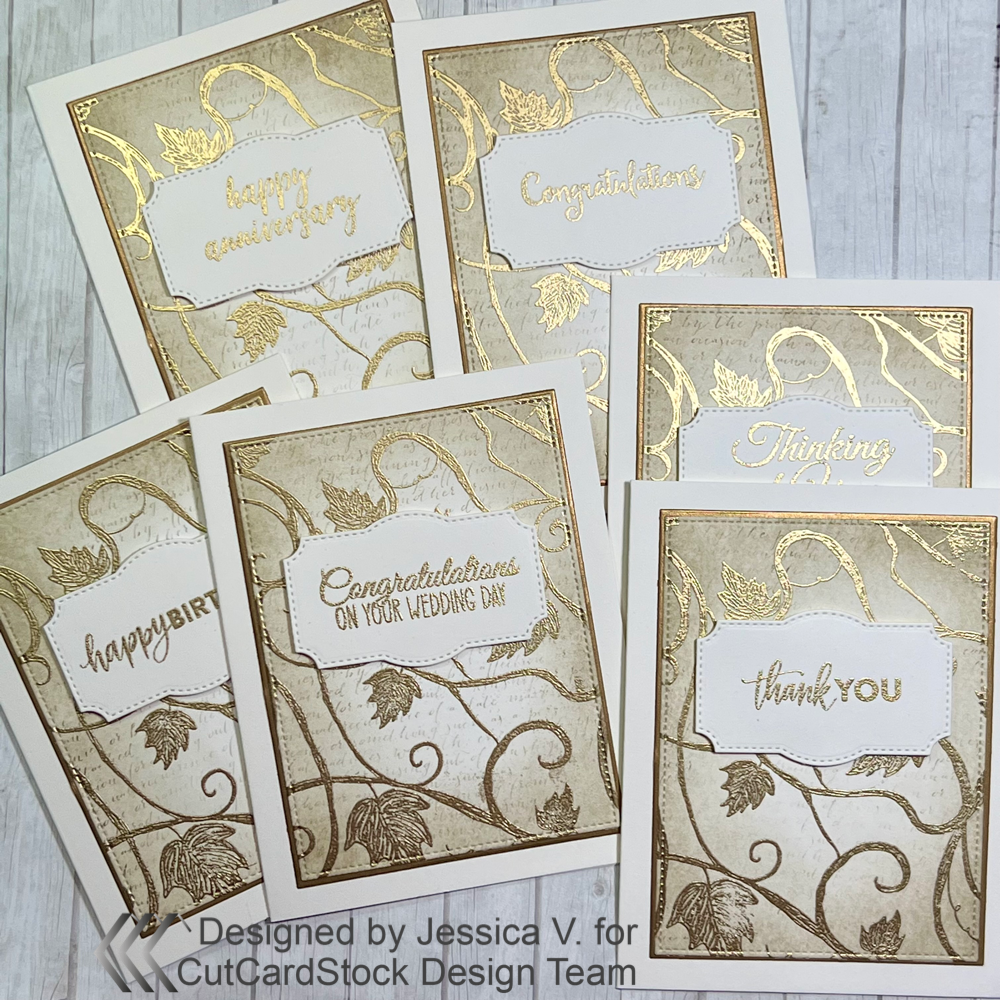
Once I had this pieces done, I focused on the background. I used another piece of the pearl ivory to hot foil a frame and sentiment. I started with the rectangle frame and taped it face down onto my cardstock with just a piece of tape at the top to create a hinge.

Then, I cut a piece of bronze hot foil and lifted the frame up to put the foil underneath, with the pretty side touching the face of the hot foil plate.

I wanted to see if I could hot foil the sentiment at the same time as the frame, so I laid them down on the foil and taped them into place as well.

Once my hot foil machine was ready and my plate sandwich all heated up, I ran it through my die cutting machine. It worked! Except I did get a lot of over foiling because I had such a large sheet of foil on there.

I used a sand eraser to take off all of the over foiling. This works really well, but try and not rub it over the areas of foil you want to keep as it can scratch the foil.

All that was left was assembling my card. I loved how it turned out – the foil and the pearl cardstock are so pretty!

Thanks for stopping by and I hope you enjoyed my card today! If you want to see more of my projects, head over to my instagram : Purple Puppy Papercrafting ! Thanks!

Metallic Floral Wedding Card

The Metallic Cardstocks at Cut Cardstock are perfect to create elegant, beautiful wedding cards. I used four different colors on this card today: Gold, Fairway, Rose Quartz, and Virtual Pearl. With just a few colors, and some alcohol markers you can create shading on your die cuts.

To start with, I cut a piece of the Virtual Pearl the same size as my card base and glued that down onto the base. I wanted to have a couple monochrome layers popped up, so I also used the virtual pearl to cut out two ornate banners of different sizes.

I used a script background stamp to create interest on the two ornate banners using a light pink ink. I have a glass mat and I stick my red rubber background stamps directly down onto the class mat and the cling foam sticks onto the glass.

Then, I ink the background stamp and put my cardstock onto it and rub all over to get the ink to transfer.

I wanted a few of the flower pieces to be a darker pink than the cardstock I had, so I used an alcohol marker to color those in. Markers work beautifully on this cardstock!

I arranged my bouquet onto the front of the card on the larger banner and used a piece of tape to hold it into place. This is where I will put the smaller banner, so I put some liquid glue down as well to help make sure they adhere to the banner once I place it down.

Before I put the small banner onto the card, I wanted to gold emboss my sentiment on it. I used gold embossing powder to emboss my wedding sentiment.

I put foam adhesive strips just on the sides of the small banner, because the flower stems would be in the middle and will be attached with that liquid glue I had already put down.

Thanks for stopping by and I hope you enjoyed my card today!

Pawsitively Adorable Bookmarks

Valentine’s Day projects need sparkle and glimmer and shine! The Stardust Metallic Cardstocks and Glitter cardstocks from CutCardstock are perfect for any Valentine’s Day project.

The Stardust Metallic cardstock hot foils beautifully and this just adds on another layer of shine! I used the Stardust Metallic Silver cardstock for the bases of my Valentine’s bookmarks.

To start, I cut down a piece of red star hot foil using a rotary cutter, making it just a bit larger than the place I was using.

Next, I made my plate, foil, paper sandwich – you want to always make sure that the foil is between your plate and your paper and that the pretty side of the foil is touching the patterned surface of the hot foil die.

Then, the sandwich goes onto the hot foil machine with the flat side of the die on the machine. Touch the button, and when it lights up solid, it goes through your die cut machine!

Look at that pretty red shine! The smooth surface of this cardstock makes it perfect for hot foiling.

I made bookmarks with these foiled panels using a large bookmark die. The foiled pattern wasn’t tall enough to go to the top, but that’s ok! Because this die comes with a topper piece that can be cut out separately.

I used the Red Glitter cardstock to cut the topper pieces and some little hearts to finish off this card. This adorable puppy was the perfect focal image for a cute Valentine bookmark – I colored him with a few gray copic markers, just to add some shadow. This stamp set was a limited Edition from Whimsy Stamps/Simon Says Stamp for Stamptember 2022. I used the Cougar Super Smooth white Cardstock to stamp my puppy image, it is perfect for copic coloring!

Just add some ribbon to the top and these pawsitively adorable bookmarks are ready to go!

Handmade Holiday-Card Set with Box!

Hello! One of my favorite gifts to give during the holiday season is a box of Greeting Cards. This time I decided to make the box match the cards! I used some luxurious, beautiful cardstock from CutCardstock.com for this project.

I started with the Stardream Metallic cardstock in Antique Gold to make the base for my card box. I will also use this cardstock as accents on the cards that I will put in the box so that they coordinate! This cardstock is gorgeous, and such a nice heavy weight. It also cuts beautifully with dies and through an electronic cutting machine! I use a Silhouette Cameo, and found this file for a card box in the Silhouette Design Store – when cutting, I used the Heavyweight Cover stock setting, which use the blade depth 7 and did 2 passes. This created a perfect smooth cut!

The other part to the file has these decorative pieces that can be added to the box to dress it up. I cut this out of the Natural White 100# cardstock. I cut this on the same setting as the gold cardstock, and it worked perfectly.

I started with ink blending the edges of the ivory cardstock, and then stamped on text using a background stamp. Before I did this, I made sure to place the pieces in the orientation that they would go on the box to make sure my text was upright.

When I stamped the text background, I wanted it to have some light and dark areas to the ink, so after inking the background, I used a blending brush just to randomly tap over the stamp before pressing it onto my panels. I thought this gave some interesting variation to the stamping.

After the stamped text background, I chose a more bold background and embossed that in gold on all the pieces.

I find it easier to adhere the decorate panels onto the box before it is all assembled. I did fold at all the score lines so I could see easier how the box needed put together and which orientation to adhere all the panels.

There are slots made in the cutting file for a ribbon to be pulled through and used for closure. I should have deleted that cut in the file before sending it to my Silhouette because I am not going to use a ribbon. I forgot! So I just covered them up with an embellishment and I am using a dot of velcro to keep the box lid closed.

I wanted the cards to coordinate with the box so I used the same Antique Gold and Natural cardstocks for the cards to go in the box. I made the card bases out of the Natural cardstock and used the Antique Gold as a mat layer to add a little shimmer and elegance. I did the same type of ink blending and stamping on the front of the cards that I did on the box panels. All I needed to add was a label with a sentiment and these cards were complete!

I think this is a great, handmade gift for the Holidays!

This post today is part of a Social Media hop hosted by Cut Cardstock. Head over to @cutcardstock for a chance to win a $25 or $15 gift card from CutCardStock and to check out all the amazing inspiration!

Notecard set with Layering Stencils

One of my favorite handmade gifts to make for people are notecard sets. Cut Cardstock makes it so easy because they have card sets of all different colors – and then notecards are already cut and scored! The matching envelopes are beautiful and high quality as well. For this project, I used the Aqua Basis A2 Folded Cards with matching envelopes.

When stamping directly onto your folded card base, you’ll need to mask off the area you don’t want to stamp on. I used some low tack paper tape to mask off the part of the back of the notecard that the stamp might touch. I did this right at the fold.

I wanted to start by adding a tone on tone stamped background onto the front of the notecard. For this, I was going to use a red rubber background stamp that was bigger than my card so I used the Misti corner to help align my cardstock but not right up against the corner of my stamp platform. The corner can be taken off to allow the stamp to go over the edge of the cardstock.

When stamping large images like backgrounds, I use this tool to help apply even pressure over the entire stamp. I made this pressure tool using the lid from a Yankee candle, and added a piece of felt on the bottom with glue. It works like a charm! (I sprayed the inside of the lid with glue and put some glitter in there as decoration prior to gluing on the felt piece!)

I always love making matching envelopes to go with my card sets. For this set, I stamped on the back flap using the same background stamp for the card. I used low tack tape to mask off the part of the envelope I didn’t want to get ink on.

I used the flower stamp to stamp on the front of the card with the same color ink. I love this tone on tone look for envelopes!

When doing card sets, I think it goes faster to do assembly line production. I did some ink blending through stencils for the focal image for my cards. I inked on the Cougar Super Smooth 80# cardstock – this cardstock is sooooooo smooth and makes ink blending so easy! The 80# version is perfect for using for die cutting images. This image is from a layered stencil bundle with matching stamp and die. I did all of the first stencil on my 5 panels, and then moved onto Stencil #2 and so on.

I love that this stamp set has an outline stamp that matches – I think it really makes the flowers pop!

I stamped and die cut sentiments from the same light blue cardstock as the notecards and then we have all our pieces ready to assemble!

Thanks for stopping by to check out my project today! I would love to see what kind of handmade gifts you like making! Tag me on Instagram : Purple Puppy Papercrafting

Stencils and Berries!

Hello friends! Thanks for stopping by today – I am having so much fun with theĀ Brutus Monroe August Subscription products! The stencils and all the berries are so yummy! I love using stencils to make backgrounds, but also to help tie in focal images and sentiments.Ā 

Today, I used the Strawberry Seeds stencil on the background as well as the sentiment circle. I love this stencil! I used two A2 sized pieces of the Perfect Blends paper because we will be doing some inking and this paper is perfect for inking!

To start with, on one panel, I used a light yellow ink to stencil seeds all over the background on a slight angle. This will be our main card panel.

Next, on the other panel, I used a darker yellow/brown color to stencil the seeds again. This will be what we use for the sentiment. 


Before die cutting the sentiment piece, I used some pinkish red inks to blend over the dark stenciled seeds panel.


Once I was happy with the overall blend of the pink piece, I die cut a stitched circle (this is what we are going to stamp our sentiment on), and inked around the edges to give some definition.


I thought a scalloped background panel would be cute, so I die cut that and then inked around the edges with the same yellow that I used for the seeds. This “Wishing you the Berry Best” sentiment from the Strawberry Social stamp set is perfect! And it was a perfect fit for the stitched circle.


Once that was all done, I colored some of the images from the Strawberry Social set and added it all on the card panel and used foam strips to add that onto a card base. 

Thanks for checking this out and I hope that you have a BERRY GOOD day!!

Product List:

Strawberry Seeds Stencil

Strawberry Social stamp set

Perfect Blend Alcohol Marker cardstock

Sparkly Rainbow Wishes!

Summer, sparkles and rainbows! What better way to bring a smile to a friend’s face than a handmade rainbow card. The Cut Cardstock Pop Tone cardstock is perfect for this project! I used the 65# and it was perfect for die cut layering and comes in so many beautiful colors!

For this card, I used Red Hot, Orange Fizz, Lemon Drop, Gumdrop Green, Blue Raspberry and Grape Jelly. I love these beautiful and vibrant colors – perfect for a rainbow!

I found a pull apart rainbow stamp in my stash, as well as a matching die. Some Rainbow Sparkle embossing powder was a perfect pairing to finish off this sparkly, happy card.

The die also cuts out the outline that allows you to perfectly place all the rainbow strips – as well as another chance to add sparkle to the card! I used the Silver glitter cardstock to cut out the outline that I will use to place all the rainbow pieces. This die has spaces for more strips in the rainbow than I was going to use, so I just snipped off the part that I didn’t want for this project and it left the perfect outline!

I used a piece of double sided adhesive to help put this rainbow together easier. I first put the outline on the adhesive and trimmed around the edges and then was able to just inlay each strip of the rainbow. This will be perfect for when I need to adhere this to my card base, because all I need to do is take the backing off of the back of the rainbow and that is covered in adhesive as well!

I made a sky background by ink blending some light blue ink with cloud stencils right onto my card base, which is a pre cut and pre scored A2 card base – 110#. I love these card bases – it is so nice to have them already cut and scored, and they are scored perfectly!

To finish, I added a sentiment from the Brutus Monroe Radiant Rainbow stamp set and adhered my rainbow on to the card base and added a few clouds that were die cut from the Pop-tone Sweet Tooth cardstock.

Wishing you a colorful, rainbow day!

I’d love to see all your creations using the beautiful Pop-tone Cardstock – tag me on Instagram:

Purple Puppy Papercrafting

Rainbows and Foil!

using Brutus Monroe – June Inspiration Box supplies

Hello! Thanks for stopping by! Today, I wanted to use some of the products from the Radiant Rainbow Inspiration Box to make a colorful, shiny card for a friend. 

Do you love to foil? I do! And you can use the printed panels and the conversation clippings with foil to add some shine to your projects. Another way to step up these panels is to do some ink blending or coloring on them as well as adding the foil. For this card, I ink blended a rainbow of colors over the panel and then used Silver DecoFoil to add the shine!

 I started with this spiral background panel from the Inspiration Box and picked out a rainbow of ink colors, I love to use Distress Inks when ink blending, and this cardstock that these panels are printed on is super smooth and perfect for ink blending!

I started in the upper left corner with the red and then just went diagonally down the panel with each color. I did go back over where the colors met with my brushes just to help soften the transition. 

I let the ink dry for a couple minutes before proceeding with the next step, which is the FOILING! I. LOVE. FOIL.

I have a Mini machine that I use when foiling, but you can also use a laminator – just make sure you let is get nice and hot before sending your panel through. I used the DecoFoil Silver foil.

Make sure you use the carrier sheet or parchment paper to sandwich your panel and foil in – and you want the pretty side of the foil facing up, with your panel beneath it.

…and then the reveal……

AHHHHH! This is why I love foil. Look at that shine! Who wouldn’t love a card with foil on it?

To finish this card, I embossed a rainbow from the new Radiant Rainbow stamp set with Sterling embossing powder on black cardstock and used the coordinating die to cut it out. I used the black easy tab foam dots to adhere the rainbow over the center of the spiral. I also added a couple conversation clippings that I just used my paper trimmer to cut out. You can also foil these, but I left them black for this card to go along with the black Cardstock rainbow die cut. 

I’d love to see all your foiling and colorful projects! Tag me on Instagram:

Purple Puppy Papercrafting

Cutie Patootie with Die-cut Inlay Background

Happy Father’s Day! Do you need a Father’s Day card for that special cat dad in your life? Well, I’ve got the card for you! I used several colors of the Cut Cardstock Basis cardstock for today’s project. This cardstock is vibrant and cuts like a dream!

I used four colors of the Basis cardstock: Light yellow, Blue, Red and Aqua. I also used the Canvas Textured Wedding Cake White cardstock for my base panel of the background. I used A2 sized pieces of this cardstock – one that I cut out using the paw print background die and the other I cut down to size to be just slightly smaller than the paw print background piece. One thing that makes this technique so much easier is to use a piece of double sized adhesive that is the size of the background panel.

I cut the paw print background die from the four pieces of colored cardstock, as well one piece of the white canvas textured cardstock.

I took the backing sheet off of one side of the double sided adhesive and put that onto the front of the full (not die cut) piece of white cardstock and then took off the top liner of the adhesive. The white die cut panel is then placed over top of the adhesive so that the adhesive sticky is showing through all of the paw prints and hearts. This is where we will inlay the paw pieces and hearts – having that sticky layer showing through makes it so easy to do this technique!

I used a jewel picker to pick up the small hearts from the red piece and put them all in place.

For the paw prints, since there are so many small pieces, I placed the whole blue piece over top of the background piece and lined it up. It was easy at this point to use my tool to push down each little piece into its place. This way made it a breeze!

I repeated the steps for each of the three colors of paw prints – blue, aqua and light yellow.

To start the assembly of the card, I used a piece of the blue cardstock and cut out a large circle from the middle – this way I could still use that same piece as a mat layer for my background panel – this is a good way to conserve cardstock! I also cut out a white circle that I stamped “Happy Father’s Day” and “From the Cats” and put a die cut assembled kitten in the middle. I used some copics on the kitten to add some stripes.

Once I had that all assembled, I glued the panel down onto a card base. I LOVE the precut and pre-scored card bases that you can get at Cut Cardstock – they are are available in a variety of weights and are cut and scored perfectly! They are also available in a variety of sizes, but since I mainly make A2 cards, I ordered the 110# in A2 size. This should keep me supplied with card bases for quite a while!

I just love how this card turned out – I have a couple cat dads in my life, and they would love this card!

I would love to see all your colorful creations using the Basis Cardstock – tag me on Instagram: @purple_puppy_papercrafting

Crafty Destash! **SOLD**

Both boxes have sold

Hey there! Well it was time – I had to go through my stash and part with some things to make room for new!

I have two boxes to start with – they will both be mailed in USPS Priority Mail Flat Rate Medium boxes.

Box A and B – have a mix of stamps, dies, stencils – and the following companies: Brutus Monroe, Simon Says Stamp, Kindred Stamps, Herto Arts, Spellbinders, Sizzix and a few others. There is a mix of new and used items – used items may be in stamp pockets and not include original packaging. Valued at well over $350.

I am selling each box for $150 + $15 shipping = $165 total – PayPal or venmo

First person to email for the box will get the first chance – must receive payment within 24 hours or will move onto the next person in line. I will update this page with “SOLD” once payment received. I will ship 2-3 days after payment received.

Email: jessica.vittek@gmail.com

If you don’t like surprises and want to know exactly what is in each box – you’re in luck! I have a video for each box showing everything that is in it!

Destash Box A – Contents video – **SOLD**

Destash Box B – Contents video – **SOLD**